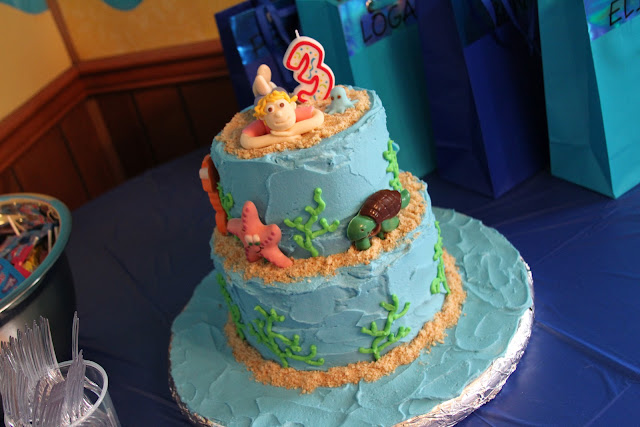
My little girl is turning three! And since she is obsessed with everything aquatic these days (especially octopuses, whales and sharks) my husband and I decided to throw her an Under the Sea themed party. I decided to do an ocean-themed cake with edible chocolate sea life critters. I was stumped on the topper for awhile. At the last minute I decided to take the leap and attempt some 3-D modeling. It took two tries and some rearranging of body parts but I think the end result was pretty awesome. Her little toy octopus was quite easy to accomplish. Here's a closer look at the two.
The 3-D chocolate molds were pretty easy but painstakingly long to make. Melting each color, painting it and refrigerating between each layer took so long. The end result was totally worth it though! If you ever make these, make sure that you make them in advance - this is not a last minute garnish! My favorite one was the starfish so here's a closer look.
So here is the deal for making this cake. Lana requested "pink" cake so I baked up two eight-inch yellow cake layers for the bottom layer and two six-inch strawberry cake layers for the top layer. I always bake my cakes a few days prior to construction so they are completely cooled when I decorate. If I am using buttercream frosting, I double-wrap the layers and place them in the refrigerator. Cold cake layers make a lot less crumbs than room temperature ones do. If I am using fondant I double-wrap the layers and let them stay at room temperature. Fondant has a nasty habit of bubbling out if you cover the cakes when they are cold. Always let the cakes completely cool before wrapping or you will get gummy cakes. Not what we want to deal with.
Next I made the candy plaques. I went to Michaels when they had their Wilton candy melts on sale and bought just about every color they had. Then I melted the colors as I needed them, "painting" in the candy cavity details first, and then filled them with the base color. (More detailed instructions of this process come with the purchased candy molds). Very slow and tedious. And yes, it is necessary to chill between each color or the colors will blend. The brushes that come with the sets are not very fine-tipped so I went ahead and picked up a painter's brush set while I was out. Made it a lot easier to do those teeny tiny details! This set was also set up to have the candy be on lollipop sticks so it was easy to put them on/in the cake. I had some plastic sticks which held up great. I would worry about paper ones getting soggy if the cake is made too far in advance.
The topper is a 3-D model made from gumpaste and fondant. I used instructions that I had from a British- based cake decorating magazine. Lots of cake decorating books have instructions in them for this process. I need a lot more practice and I feel it is something that you really just have to work at and get the feel for it. I was never good at sculpture work in art class. Actually I was never really good at anything in art class! Hopefully I will improve as I continue to practice. The construction of the cake is pretty simple. Stack cakes. Base frost with blue frosting. I left it looking messy to try to simulate the feel of water. The "sand" is vanilla wafers that I threw into a Ziploc bag and crushed with a rolling pin. Then I stuck my ocean critters around the cake, piped on some sea plants and plopped little Lana and her octopus on top. And that's how you do it. Simple, right? Happy Third Birthday Lana! Daddy and I love you so much!


